
The Essentials: What Every Email Marketer Needs to Know
Your email campaign is ready. The subject line is irresistible, your design looks fantastic, and your audience is perfectly segmented.
You hit send.
But what if a significant number of those carefully crafted emails never reach the inbox?
The problem might have nothing to do with your content. It could be your email authentication.
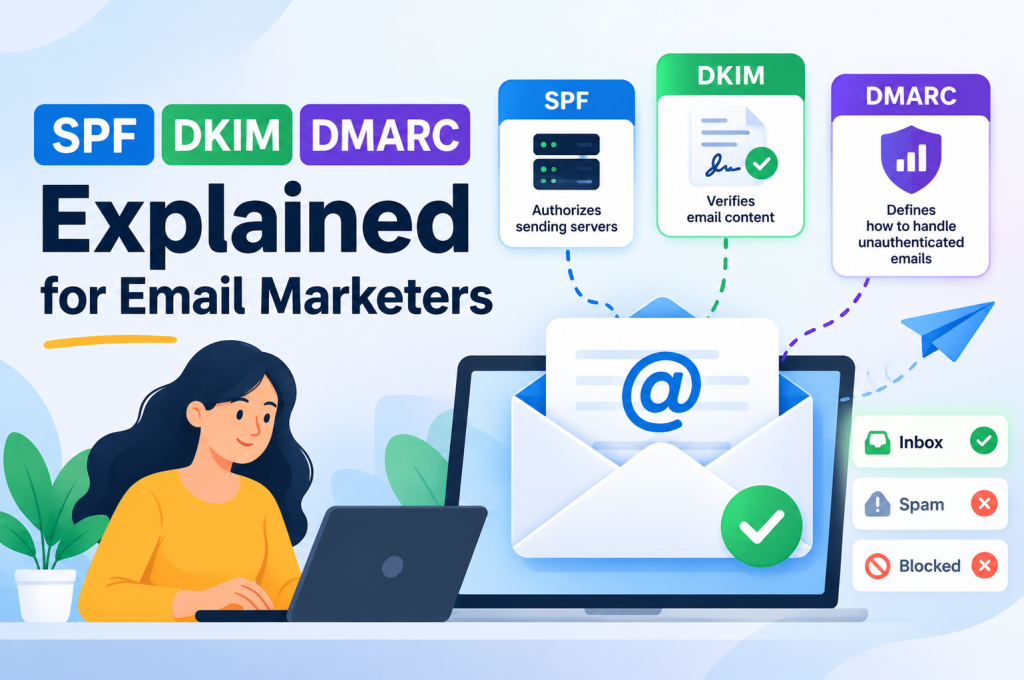
SPF, DKIM and DMARC are three essential email security protocols that help receiving mail servers determine whether messages genuinely originate from authorised senders. Together, they protect your sending domain, reduce email spoofing and support better email deliverability.
Here’s what you need to know:
- SPF (Sender Policy Framework) verifies whether the server sending an email is authorised to send messages on behalf of a particular domain.
- DKIM (DomainKeys Identified Mail) uses cryptographic signatures to help confirm that an email was authorised by the signing domain and hasn’t been improperly altered during transmission.
- DMARC (Domain-based Message Authentication, Reporting and Conformance) connects SPF and DKIM authentication with domain alignment, allowing domain owners to specify how receiving servers should handle messages that fail authentication.
- Email authentication protects your reputation. Properly configured records make it harder for cybercriminals to impersonate your domain and can support stronger sender trust.
- Major email providers have authentication requirements. Gmail and Yahoo require bulk senders to meet additional standards, including DMARC and aligned authentication.
- Authentication isn’t a guaranteed inbox pass. Your sending reputation, spam complaint rate, email content and audience engagement still influence where your messages land.
The bottom line: If you’re sending newsletters, promotional campaigns, abandoned basket reminders or automated customer journeys, understanding SPF, DKIM and DMARC is no longer optional. It’s part of running a professional email marketing operation.
And the good news? You don’t need to be a network engineer to understand how these protocols work.
Let’s break them down.
What Are SPF, DKIM and DMARC?
Think of email authentication as the digital equivalent of checking someone’s identity before allowing them into a secure building.
Anyone can write a name on an envelope. That doesn’t prove they are who they claim to be.
Email works in a surprisingly similar way.
Without appropriate authentication controls, attackers can forge email addresses to make malicious messages appear to originate from legitimate businesses. This practice, known as email spoofing, is frequently used in phishing attacks, fraudulent payment requests and brand impersonation.
SPF, DKIM and DMARC address different parts of this problem.
SPF: Verifying Who Is Allowed to Send
Sender Policy Framework (SPF) identifies which mail servers and IP addresses are authorised to send email using a domain in the SMTP envelope.
Imagine giving your office receptionist a list of approved couriers.
When someone arrives claiming to represent your business, the receptionist checks whether they’re on the list.
That’s broadly how SPF authentication works.
The receiving email server checks the sender’s SPF DNS record to determine whether the connecting server is authorised.
If the server is listed, SPF can pass.
If it isn’t, SPF may fail.
However, SPF alone doesn’t prove that the visible From address belongs to the authenticated domain. That’s an important distinction we’ll explore later.
DKIM: Verifying the Message Hasn’t Been Tampered With
DomainKeys Identified Mail (DKIM) adds a digital signature to outgoing emails.
Think of it as a tamper-evident seal attached to a package.
The sender uses a private cryptographic key to sign selected parts of the email. The receiving mail server retrieves the corresponding public key from DNS and checks the signature.
If verification succeeds, the recipient’s server has evidence that the signed content hasn’t been altered in a way that invalidates the signature.
DKIM also identifies the domain responsible for signing the message.
This matters enormously for email marketers using third-party platforms to send campaigns.
DMARC: Establishing the Rules
Domain-based Message Authentication, Reporting and Conformance (DMARC) builds on SPF and DKIM.
It answers a crucial question:
Does the domain that passed authentication align with the domain the recipient sees in the email’s From address?
DMARC also allows domain owners to publish policies indicating how messages that fail its checks should be treated.
There are three principal DMARC policy options:
- None (
p=none) — Requests monitoring without asking receiving servers to quarantine or reject messages based on DMARC failure. - Quarantine (
p=quarantine) — Requests that failing messages receive suspicious treatment, such as placement in a spam folder. - Reject (
p=reject) — Requests that failing messages be rejected.
DMARC reporting also provides visibility into which systems are sending emails using your domain and whether their authentication checks are succeeding.
This makes DMARC particularly valuable for businesses managing multiple email marketing platforms, customer communication tools and transactional email services.
Remember: SPF checks authorised sending infrastructure, DKIM verifies cryptographic signatures, and DMARC checks alignment while providing policy and reporting capabilities. They work together, but they aren’t interchangeable.
Why Email Authentication Matters for Email Marketers
Email marketing is built on trust.
Subscribers trust that your messages genuinely come from your business. Email providers need evidence that you’re a legitimate sender. And your brand depends on maintaining a positive reputation across every communication channel.
Poor email authentication can undermine all three.
1. It Supports Better Email Deliverability
You could have the most persuasive email copy in your industry, but it won’t generate results if recipients never see it.
Email deliverability describes your ability to get messages accepted and placed in recipients’ inboxes rather than rejected or filtered into spam.
SPF, DKIM and DMARC help receiving email providers assess whether your messages are authentic.
When authentication is properly configured, you’re providing evidence that your emails originate from authorised sending infrastructure.
That doesn’t automatically guarantee inbox placement.
Email providers also evaluate factors such as:
- Your domain and IP sender reputation.
- Spam complaints and recipient feedback.
- Mailing list quality and permission practices.
- Sending consistency and unusual volume spikes.
- Message content and potentially suspicious links.
- Historical engagement and recipient preferences.
Nevertheless, authentication provides an important technical foundation.
Without it, you’re making the email provider’s job harder and potentially introducing avoidable delivery problems.
2. It Protects Your Brand Against Email Spoofing
Imagine a customer receives an email that appears to come from your business.
The branding looks convincing. The sender’s name is familiar. The message even references a realistic order or promotion.
But the email is fraudulent.
The customer clicks a malicious link, shares sensitive information or makes a payment to an attacker.
Even though your business didn’t send the message, the customer may associate the experience with your brand.
This is where domain authentication and DMARC policy enforcement become particularly important.
By implementing SPF, DKIM and an appropriately enforced DMARC policy, you make it harder for attackers to successfully impersonate your domain through direct email spoofing.
It’s not complete protection against every phishing technique. Criminals can still use lookalike domains, compromised accounts and other methods.
But it significantly strengthens your defence against unauthorised use of your legitimate domain.
3. It Helps You Meet Bulk Email Sender Requirements
Major mailbox providers have introduced stricter expectations for businesses sending large volumes of email.
Google and Yahoo’s bulk sender requirements place particular emphasis on authentication, responsible sending practices and unsubscribe functionality.
For qualifying bulk senders, these requirements include:
- SPF and DKIM authentication.
- A published DMARC record, with at least a monitoring policy where permitted.
- Alignment between the visible From domain and at least one authenticated SPF or DKIM domain.
- Low spam complaint rates.
- Appropriate unsubscribe mechanisms, including one-click unsubscribe for applicable marketing and subscribed messages.
Other providers, including Microsoft, have also introduced stronger requirements for high-volume senders.
These rules matter whether you’re running promotional newsletters, seasonal campaigns or automated ecommerce sequences.
Ignoring authentication requirements can lead to rejected messages, spam placement and inconsistent campaign performance.
A useful distinction: Requirements differ by mailbox provider, sender classification and sending volume. Marketers should check the latest official provider documentation rather than assume every rule applies identically to every campaign.
4. It Protects the Value of Your Marketing Investment
Email rarely operates in isolation.
A business might invest in search engine optimisation to attract organic visitors, build a subscriber list through valuable content and then use email campaigns to nurture those relationships.
If authentication problems prevent follow-up messages from reaching subscribers, some of that investment loses its potential value.
Consider a typical customer journey:
- Someone discovers your business through a search engine.
- They visit your website and subscribe to your newsletter.
- Your marketing platform sends a welcome email.
- The subscriber receives a useful introductory offer.
- Subsequent campaigns encourage a purchase or enquiry.
Now imagine the welcome email fails authentication.
The subscriber may never see your introduction. They might miss the offer entirely. Your carefully designed automation loses momentum before the relationship has properly begun.
Authentication isn’t simply an IT responsibility.
It’s part of protecting your marketing funnel.
5. It Makes Third-Party Email Platforms Safer to Use
Most modern businesses don’t send marketing campaigns directly from their own email servers.
Instead, they rely on email service providers and marketing automation platforms.
Examples include Klaviyo, Mailchimp, HubSpot and other specialist services.
These platforms simplify campaign creation, segmentation, automation and reporting.
But they also introduce an important technical consideration.
Your email marketing provider must be configured to authenticate messages correctly on behalf of your sending domain.
Depending on the platform, this might involve:
- Publishing DKIM DNS records.
- Configuring a custom return-path domain.
- Verifying domain ownership.
- Ensuring SPF or DKIM alignment with your visible From address.
- Monitoring DMARC reports for authentication failures.
An email can pass SPF using a third-party provider’s domain while still failing SPF alignment with your brand’s visible From domain.
Fortunately, properly aligned DKIM authentication can independently satisfy DMARC.
Understanding this distinction helps marketers avoid a common mistake: assuming that because an email platform says authentication has passed, every part of the domain authentication setup must be correct.
How SPF, DKIM and DMARC Work Together
Each protocol performs a different task, but their real strength comes from working together.
Imagine your business sends a promotional email to a customer using an email marketing platform.
The message travels from the platform’s outgoing mail server to the recipient’s email provider.
Before deciding how to handle the message, the receiving server can perform several authentication checks.
The Email Authentication Process, Step by Step
Step 1: Your marketing platform sends the email
Your email service provider prepares the message and sends it through its outgoing mail infrastructure.
The message contains information identifying the sending server, an SMTP envelope sender and a visible From address.
These identities aren’t necessarily the same.
Step 2: The receiving server checks SPF
The recipient’s mail server identifies the connecting IP address and checks whether that server is authorised by the relevant SPF record.
A successful result indicates that the sending infrastructure is permitted to send using the SPF-checked domain.
Step 3: The receiving server verifies DKIM
If the email contains a DKIM signature, the receiving server retrieves the appropriate public key from DNS.
It then verifies the signature against the signed message content.
A successful verification supports the authenticity and integrity of the signed email.
Step 4: DMARC evaluates authentication and alignment
The receiving server checks whether at least one of the following conditions is satisfied:
- SPF passes and its authenticated domain aligns with the visible From domain.
- DKIM passes and its signing domain aligns with the visible From domain.
Only one aligned, successful authentication method is required for DMARC to pass.
Step 5: The receiving server applies its handling decisions
If DMARC fails, the receiving server considers the domain owner’s published DMARC policy alongside its own filtering and security systems.
Depending on the circumstances, the message may be accepted, quarantined or rejected.
Step 6: Reporting provides visibility
If DMARC reporting has been configured and the receiving provider supports it, authentication information may be included in reports sent to the domain owner’s designated reporting address.
These reports can help identify legitimate sending services, misconfigurations and possible domain abuse.
SPF vs DKIM vs DMARC: The Key Differences
| Feature | SPF | DKIM | DMARC |
|---|---|---|---|
| Main purpose | Authorise sending servers | Verify signed message integrity | Evaluate aligned authentication and publish policy |
| Full name | Sender Policy Framework | DomainKeys Identified Mail | Domain-based Message Authentication, Reporting and Conformance |
| Uses DNS records | Yes | Yes | Yes |
| Checks sending IP address | Yes | No | Indirectly through SPF results |
| Uses cryptographic signatures | No | Yes | No |
| Checks visible From domain alignment | No | No | Yes |
| Supports domain-level reporting | No | No | Yes |
| Helps prevent direct domain spoofing | Partially | Partially | Yes, especially with enforcement |
| Can independently satisfy DMARC | Yes, when passing and aligned | Yes, when passing and aligned | Not applicable |
A Simple Example of Domain Alignment
Suppose your marketing email uses the following visible sender address:
newsletter@example.com
Your email platform sends the message using:
bounce.emailplatform.com
SPF might pass because the platform is authorised to send using emailplatform.com.
However, that doesn’t mean SPF is aligned with example.com.
If the message also contains a valid DKIM signature using:
d=example.com
Then DKIM can provide the aligned authentication necessary for DMARC to pass.
This is why SPF alignment vs DKIM alignment is such an important concept for email marketers.
An authentication result can be technically successful without satisfying DMARC’s domain alignment requirement.
The distinction becomes particularly relevant when businesses use external platforms for newsletters, transactional emails, customer relationship management and automated campaigns.
And it explains why simply publishing an SPF record isn’t enough to guarantee successful DMARC authentication.
How to Set Up SPF, DKIM and DMARC for Email Marketing
Understanding email authentication is one thing. Getting it configured correctly is another.
Fortunately, setting up SPF, DKIM and DMARC doesn’t have to be complicated. Most modern email marketing platforms provide the DNS records you need, along with instructions for adding them to your domain.
The challenge isn’t usually creating the records.
It’s making sure they work together without accidentally disrupting legitimate emails.
Whether you’re sending newsletters through Mailchimp, managing ecommerce campaigns in Klaviyo or running automated customer journeys through HubSpot, the underlying principles remain largely the same.
Let’s work through each authentication protocol.
Step 1: Identify Every Service Sending Email From Your Domain
Before changing any DNS settings, establish which services currently send emails using your business domain.
This is one of the most frequently overlooked parts of email authentication.
Your marketing team might use one platform, while your sales department uses another. Meanwhile, your website could send transactional emails through an entirely different provider.
Common sending sources include:
- Email marketing platforms: Mailchimp, Klaviyo, Brevo and ActiveCampaign.
- Business email providers: Google Workspace and Microsoft 365.
- CRM systems: HubSpot, Salesforce and other customer management platforms.
- Ecommerce platforms: Shopify, WooCommerce and related integrations.
- Transactional email services: SendGrid, Mailgun, Postmark and Amazon SES.
- Website notifications: Contact form submissions, booking confirmations and account notifications.
- Marketing automation tools: Lead nurturing, abandoned basket recovery and customer onboarding systems.
Why does this matter?
Because an authentication setup that works perfectly for your newsletter might unintentionally interfere with another legitimate sending service.
For example, imagine your marketing emails authenticate correctly, but your website’s enquiry notifications fail after you change your DNS records.
You could end up missing valuable customer enquiries without immediately realising why.
If your business relies on a professionally developed website, coordinating email authentication with your website design and development setup helps ensure that contact forms, automated notifications and transactional messages continue functioning as expected.
Before proceeding, create a complete inventory of your authorised email senders.
Record which domain each service uses, whether it supports DKIM signing and whether it requires SPF configuration.
This small amount of preparation can prevent considerable troubleshooting later.
Step 2: Configure Your SPF Record
SPF authentication begins with a DNS TXT record.
The record tells receiving mail servers which IP addresses and sending services are authorised to send email using the relevant domain.
Here’s an illustrative SPF record:
example.com. IN TXT "v=spf1 include:_spf.exampleprovider.com -all"This example contains three important elements:
| SPF component | Meaning |
|---|---|
v=spf1 | Identifies the record as SPF version 1 |
include:_spf.exampleprovider.com | Authorises sending infrastructure that passes the referenced provider’s SPF policy |
-all | Indicates that other sending sources should fail SPF |
The provider domain shown above is illustrative. Your actual SPF record must use the values supplied by your email service provider.
How to Add an SPF Record
The precise interface varies depending on your DNS hosting provider, but the general process is straightforward.
- Sign in to the service managing your domain’s DNS records.
- Open the DNS management section.
- Check whether an SPF TXT record already exists for the relevant domain.
- If one exists, update it to include all authorised sending services rather than creating a duplicate.
- If none exists, create a new TXT record using the appropriate SPF configuration.
- Save your changes and allow time for DNS propagation.
- Run an SPF record lookup to confirm that the record is publicly available and syntactically valid.
Important: A domain should have only one SPF record at a given DNS name.
Publishing multiple SPF records at the same name can cause an SPF permanent error, commonly called an SPF permerror.
If you use several email providers, their authorised sending mechanisms generally need to be combined into one valid SPF record.
Understanding SPF Softfail vs Hardfail
Two SPF mechanisms often cause confusion.
SPF softfail (~all)
This indicates that sources not otherwise authorised by the SPF record are probably unauthorised, but the domain owner is not making as strong an assertion as a hardfail.
SPF hardfail (-all)
This explicitly indicates that sources not otherwise authorised should fail SPF.
Neither setting guarantees a particular inbox outcome. Receiving mail servers make their own handling decisions, and DMARC policy is evaluated separately.
The correct choice depends on your sending infrastructure and whether you’ve accounted for every legitimate sender.
Avoid switching to a restrictive SPF configuration before completing your sender inventory.
The SPF 10 DNS Lookup Limit
Here’s a technical detail that can cause major headaches for growing marketing teams.
SPF evaluation permits a maximum of 10 DNS-query-causing mechanisms and modifiers.
This limit includes mechanisms such as:
includeamxexistsredirect
The limit applies to the evaluation process, including relevant nested lookups, rather than simply counting the number of include statements visible in your record.
If the evaluation exceeds the limit, SPF can return a permanent error.
Why is this particularly relevant to marketers?
Because businesses frequently add new email platforms without reviewing their existing SPF configuration.
You might begin with Google Workspace, add an email marketing service, introduce a CRM and later connect a transactional email provider.
Before long, your SPF record can become unnecessarily complicated.
Some organisations use SPF record flattening to reduce DNS lookup requirements, replacing certain provider references with IP-based mechanisms.
However, flattening requires careful maintenance because providers may change their sending infrastructure.
A safer starting point is to remove obsolete sending services, review the mechanisms actually required and follow each provider’s current authentication instructions.
SPF best practice: Keep your record accurate, avoid duplicate SPF policies and check the DNS lookup limit whenever you introduce another sending service.
Step 3: Configure DKIM Authentication
SPF verifies authorised sending infrastructure.
DKIM takes a different approach.
It uses public key cryptography to verify a digital signature attached to an email.
For marketers, DKIM is especially valuable because it can authenticate a message using your brand’s domain even when a third-party service handles delivery.
How DKIM Signing Works
When your email platform prepares an outgoing message, it generates a cryptographic signature using a private key.
That signature is added to the email header.
The receiving mail server then retrieves the corresponding public key from DNS and uses it to verify the signature.
If verification succeeds, the receiving server has evidence that the signed parts of the message haven’t been improperly modified.
The private key remains with the signing service, while the public key is made available through DNS.
This arrangement allows receiving servers to verify signatures without requiring access to the sender’s private key.
What Does a DKIM DNS Record Look Like?
A simplified DKIM TXT record might look like this:
selector1._domainkey.example.com. IN TXT "v=DKIM1; k=rsa; p=MIIBIjANBgkqh..."The public key has been shortened for illustration and is not usable as shown.
Here’s what the main components mean:
| DKIM component | Purpose |
|---|---|
selector1 | Identifies which DKIM key should be retrieved |
_domainkey | Standard DNS namespace used for DKIM keys |
v=DKIM1 | Identifies the DKIM record version |
k=rsa | Specifies the cryptographic key type |
p= | Contains the public key used for signature verification |
Your email marketing provider may ask you to publish a TXT record or one or more CNAME records that point to DKIM keys managed by the provider.
Both approaches can be valid, depending on the service.
How to Set Up DKIM for Your Marketing Platform
Most platforms make this relatively straightforward.
- Open your email provider’s domain authentication settings.
- Select the sending domain you want to authenticate.
- Generate or retrieve the provider’s DKIM DNS records.
- Sign in to your DNS hosting account.
- Add the records exactly as supplied.
- Wait for the DNS changes to become publicly available.
- Return to your email platform and complete its domain verification process.
- Send a test email and inspect its authentication results.
Some providers automatically manage DKIM key rotation when you use their recommended DNS configuration.
Others may require additional maintenance.
Why DKIM Key Rotation Matters
Cryptographic keys shouldn’t necessarily remain unchanged forever.
DKIM key rotation involves replacing existing signing keys with new ones to maintain appropriate security and reduce risks associated with compromised or ageing keys.
Many providers support 2048-bit RSA keys, although supported key types and lengths vary.
When rotating keys, avoid deleting the old public key prematurely.
Messages already sent may still be in transit or awaiting verification, so a carefully managed transition helps prevent unnecessary DKIM failures.
Can DKIM Fail Even When the Email Is Legitimate?
Absolutely.
A DKIM authentication failure doesn’t automatically mean an email is fraudulent.
Legitimate messages can fail verification because of:
- Incorrect or missing DKIM DNS records.
- Misconfigured DKIM selectors.
- Expired, replaced or unavailable public keys.
- Email content modifications after signing.
- Certain forwarding or mailing list transformations.
- Incorrect domain authentication settings in the sending platform.
For example, a service that modifies signed email content after the signature has been generated can cause DKIM verification to fail.
This is why testing matters.
Don’t assume that because your marketing platform displays a green verification indicator, every message will always authenticate successfully.
Step 4: Publish Your DMARC Record
Once SPF and DKIM are configured, it’s time to connect them through DMARC.
DMARC adds two capabilities that are particularly useful for marketers:
- Domain alignment: Checking whether an authenticated SPF or DKIM domain aligns with the visible From domain.
- Policy and reporting: Publishing handling preferences for messages that fail DMARC and requesting authentication reports from participating receivers.
A basic monitoring DMARC record might look like this:
_dmarc.example.com. IN TXT "v=DMARC1; p=none; rua=mailto:dmarc@example.com"This example instructs participating receiving servers that the domain owner is monitoring DMARC results without requesting quarantine or rejection based on DMARC failure.
It also specifies an address for aggregate authentication reports.
Understanding the Main DMARC Tags
| DMARC tag | What it controls |
|---|---|
v=DMARC1 | Identifies the record as DMARC |
p=none | Requests monitoring without DMARC-based enforcement |
p=quarantine | Requests suspicious handling of failing messages |
p=reject | Requests rejection of failing messages |
rua= | Specifies where aggregate DMARC reports should be sent |
ruf= | Specifies an address for failure reports, where supported |
adkim= | Sets relaxed or strict DKIM alignment |
aspf= | Sets relaxed or strict SPF alignment |
pct= | Specifies a percentage for applying quarantine or reject policies |
sp= | Specifies a policy for subdomains |
Not every tag is required.
For most businesses beginning their DMARC implementation, the most useful starting point is a valid record with a monitoring policy and an appropriate aggregate reporting destination.
How to Create a DMARC Record
Follow these steps:
- Open your domain’s DNS management interface.
- Create a TXT record at
_dmarcfor the relevant domain. - Enter a valid DMARC policy.
- Configure an aggregate reporting address if you want to receive reports.
- Save the record.
- Verify it using a DMARC lookup tool.
- Review authentication reports before moving to stricter enforcement.
If you use a third-party DMARC reporting service, follow its instructions for report destinations and any necessary external reporting authorisation.
Don’t rush directly to p=reject unless you’re confident that all legitimate email sources authenticate correctly and satisfy domain alignment.
A restrictive policy can be valuable, but introducing it without adequate testing may disrupt legitimate communications.
Understanding DMARC Policies: None, Quarantine and Reject
Choosing a DMARC policy is one of the most important decisions in your authentication setup.
The right approach depends on how well you understand your sending infrastructure and whether your legitimate messages consistently pass aligned authentication.
DMARC Policy None: Monitor First
v=DMARC1; p=none; rua=mailto:dmarc@example.comA monitoring policy allows you to gather information about authentication results without requesting DMARC-based quarantine or rejection.
This is often a sensible starting point for businesses implementing DMARC for the first time.
It helps you discover which systems are sending email using your domain and whether those systems are correctly configured.
However, p=none doesn’t provide DMARC policy enforcement against spoofed messages.
Receiving servers can still filter or reject emails based on their own security rules.
DMARC Policy Quarantine: Introduce Protection
v=DMARC1; p=quarantine; rua=mailto:dmarc@example.comA quarantine policy requests that receiving servers treat messages failing DMARC as suspicious.
Depending on the receiving provider, this may mean placing the message in a spam folder or applying other restrictive handling.
This represents a stronger protective posture than monitoring alone.
Before introducing quarantine, review your DMARC reports and confirm that legitimate email services are authenticating successfully.
DMARC Policy Reject: Stronger Enforcement
v=DMARC1; p=reject; rua=mailto:dmarc@example.comA reject policy requests that receiving mail servers reject messages failing DMARC.
This is generally the strongest of the three main DMARC policy options.
It can substantially reduce successful direct spoofing of your domain when receivers honour the policy.
But it also increases the importance of correct authentication configuration.
If a legitimate sending service isn’t properly aligned, its messages may be rejected.
For this reason, DMARC enforcement should be introduced as part of a planned rollout rather than a rushed DNS change.
A Practical DMARC Enforcement Strategy
A sensible implementation follows four stages:
- Discover: Identify legitimate email sources and publish a monitoring policy.
- Analyse: Review DMARC aggregate reports and investigate authentication failures.
- Correct: Resolve SPF, DKIM and domain alignment problems across your sending services.
- Enforce: Introduce quarantine or reject policies once legitimate traffic is consistently authenticating.
Continue monitoring after enforcement.
Email systems evolve. Marketing teams adopt new platforms, websites gain new integrations, and businesses change their communication infrastructure.
A configuration that works today can become outdated tomorrow.
SPF Alignment vs DKIM Alignment: What’s the Difference?
Domain alignment is one of the most misunderstood aspects of email authentication.
It’s also one of the most important.
A message can pass SPF and DKIM authentication checks yet still fail DMARC if neither authenticated domain aligns with the domain displayed in the From address.
Let’s look at why.
The Difference Between Envelope From and Header From
Email messages can contain multiple sender identities.
Two particularly important ones are:
Envelope From
This is the SMTP return-path identity, commonly used for handling delivery failures and bounced messages.
SPF evaluates the relevant SMTP identity, generally the envelope sender domain, although special handling applies to messages with an empty reverse-path.
Header From
This is the sender address displayed to the recipient in their email application.
For example:
From: Red Frog Media <newsletter@example.com>
DMARC uses the domain in this visible From header as the reference for alignment.
The two domains don’t necessarily have to be identical.
But to pass DMARC, at least one successful authentication method must use an appropriately aligned domain.
Relaxed vs Strict DMARC Alignment
DMARC supports two alignment modes.
Relaxed alignment
Relaxed alignment generally allows the authenticated domain and visible From domain to differ at the subdomain level, provided they share the same organisational domain.
For example:
- Header From:
example.com - DKIM signing domain:
mail.example.com
These domains can satisfy relaxed DKIM alignment.
Strict alignment
Strict alignment requires an exact domain match.
Using the same example:
- Header From:
example.com - DKIM signing domain:
mail.example.com
These domains would not satisfy strict DKIM alignment.
The relevant DMARC tags are:
adkim=r
aspf=r
For relaxed alignment, and:
adkim=s
aspf=s
For strict alignment.
Relaxed alignment is the default when these tags are omitted.
For many email marketing setups, relaxed alignment provides useful flexibility while maintaining domain-based authentication controls.
Why Custom Return-Path Domains Matter
Some email marketing platforms use their own domains for bounce handling.
This can result in SPF passing for the provider’s domain rather than your brand’s domain.
A custom return-path domain allows supported platforms to use a domain associated with your business for the SMTP envelope sender.
For example:
bounce.example.com
When configured correctly, this can help SPF satisfy relaxed DMARC alignment with:
example.com
Not every provider offers this feature, and the setup process varies.
Also remember that SPF alignment isn’t mandatory if DKIM passes and aligns.
For many third-party marketing platforms, correctly configured DKIM provides the simplest route to reliable DMARC authentication.
Gmail, Yahoo and Microsoft: What Bulk Email Senders Need to Know
Email authentication has become increasingly important as major mailbox providers tighten their expectations for high-volume senders.
For marketers, these requirements are more than technical recommendations.
They can directly influence whether campaigns are accepted, rejected or delivered to spam.
Gmail Sender Requirements
Google introduced enhanced requirements for bulk email senders in 2024.
Senders delivering approximately 5,000 or more messages per day to personal Gmail accounts are subject to additional requirements.
These include SPF and DKIM authentication, a published DMARC record and alignment between the visible From domain and at least one authenticated domain.
Google also expects senders to follow appropriate message formatting, maintain low spam complaint rates and support suitable unsubscribe functionality.
For marketing and subscribed messages, one-click unsubscribe is an important requirement.
Google recommends keeping user-reported spam rates below 0.1% and avoiding rates of 0.3% or higher.
These thresholds shouldn’t be treated as a guarantee of inbox placement.
Even fully authenticated senders can experience filtering problems if their campaigns generate complaints or other negative signals.
Yahoo Sender Requirements
Yahoo introduced similar enhanced sender standards in 2024.
Bulk senders are expected to authenticate messages, publish DMARC policies, manage complaint rates and make unsubscribing straightforward.
Yahoo’s requirements also emphasise alignment and responsible sending behaviour.
The broader message is clear.
Mailbox providers want legitimate senders to be identifiable, accountable and respectful of recipient preferences.
Microsoft Bulk Sender Requirements
Microsoft has also strengthened authentication expectations for high-volume senders to its consumer email services.
Requirements introduced in 2025 include SPF, DKIM and DMARC for qualifying high-volume senders.
Businesses sending large campaigns should therefore assess their authentication setup across Gmail, Yahoo and Microsoft rather than optimising for only one provider.
Always consult the latest official documentation because enforcement practices and provider-specific thresholds can change.
Why One-Click Unsubscribe Matters
Authentication helps establish whether a message is genuinely associated with the claimed sending domain.
Unsubscribe functionality addresses a different problem.
It allows recipients to stop receiving unwanted marketing messages easily.
If subscribers struggle to unsubscribe, they may mark your messages as spam instead.
That behaviour can damage your sending reputation.
For applicable marketing messages, one-click unsubscribe is typically implemented through email headers that allow compatible mailbox providers to present a convenient unsubscribe action.
A visible unsubscribe link in the email body remains important, but it isn’t necessarily a substitute for the required header-based mechanism.
The lesson for marketers: Good email deliverability requires both technical authentication and responsible subscriber management.
Use Google Postmaster Tools to Monitor Sender Reputation
Google Postmaster Tools can provide useful information about email sending performance for eligible domains with sufficient data.
Depending on available reporting, it can help you monitor authentication, spam complaints, delivery errors and other sender-related signals.
Combine this information with your email platform’s campaign reports and DMARC aggregate reports.
Together, these sources provide a more complete picture of how your messages are being handled.
And if your business invests in PPC advertising to generate leads, maintaining reliable follow-up emails is particularly important.
A paid campaign might successfully attract a prospective customer, but if the resulting welcome message, lead nurture sequence or appointment confirmation never arrives, part of that acquisition opportunity can be wasted.
Your marketing channels should support one another.
Email authentication helps ensure that the communication infrastructure behind those channels is dependable.
Common SPF, DKIM and DMARC Errors (And How to Fix Them)
You’ve configured your SPF record, enabled DKIM signing and published a DMARC policy.
Everything should be working perfectly.
Except your email marketing platform is reporting authentication failures. Some subscribers aren’t receiving campaigns, and your DMARC reports contain unfamiliar error messages.
Sound familiar?
Email authentication problems are surprisingly common, particularly when businesses use multiple sending services.
The good news is that most issues can be traced to a handful of configuration mistakes.
Let’s examine the most common SPF, DKIM and DMARC errors, what causes them and how to resolve them without unnecessarily disrupting your marketing campaigns.
1. SPF Authentication Failed
An SPF failure occurs when the receiving mail server cannot confirm that the sending server is authorised by the relevant SPF policy.
Possible causes include:
- The sending server’s IP address isn’t authorised.
- Your email service provider is missing from the SPF record.
- The SPF record contains incorrect syntax.
- DNS changes haven’t propagated.
- The email was forwarded through a server not authorised by the original envelope sender’s SPF policy.
How to fix it:
Start by identifying which server actually sent the message.
Check the sending IP address, the SMTP envelope sender domain and the SPF authentication result.
Then compare that information against the published SPF record for the domain being checked.
If a legitimate sending service is missing, follow its documentation to update your SPF configuration.
Avoid adding arbitrary IP addresses or provider mechanisms without confirming they’re necessary.
An overly permissive SPF record can undermine the protection you’re trying to establish.
2. SPF Permerror: Too Many DNS Lookups
An SPF permerror indicates a permanent problem evaluating the SPF policy.
One common cause is exceeding the permitted 10 DNS-query-causing mechanisms and modifiers.
For example, your SPF record might reference several external providers, each of which references additional DNS records.
The visible record may look relatively short, but the full evaluation can exceed the lookup limit.
How to fix it:
- Run an SPF validation check.
- Identify which mechanisms and nested includes contribute to DNS lookups.
- Remove obsolete email sending services.
- Review whether every included mechanism is necessary.
- Simplify the record where possible.
- Test the revised SPF configuration.
If you’re considering SPF record flattening, remember that provider IP addresses can change.
A flattened record that isn’t maintained may eventually become inaccurate.
3. Multiple SPF Records Published
This is another frequent DNS configuration mistake.
Suppose your domain contains two separate SPF TXT records:
v=spf1 include:_spf.provider-one.example -allv=spf1 include:_spf.provider-two.example -allThese are illustrative records, not live provider configurations.
Although both might appear reasonable individually, publishing multiple SPF records at the same DNS name is invalid.
SPF evaluation can return a permanent error.
How to fix it:
Combine the authorised sending mechanisms into one valid SPF record.
For example:
v=spf1 include:_spf.provider-one.example include:_spf.provider-two.example -allBefore publishing the combined record, verify that the referenced services are legitimate, the syntax is correct and the complete SPF evaluation remains within the DNS lookup limit.
4. DKIM Signature Verification Failed
A DKIM signature verification failure means the receiving server couldn’t successfully validate the email’s cryptographic signature.
Common causes include incorrect DNS records, missing public keys, an incorrect DKIM selector or modifications to signed message content.
For example, imagine your email marketing platform signs a message before another system adds content to its body.
If that modification changes the content covered by the signature, DKIM verification may fail.
How to fix it:
Check the following:
- Is the DKIM selector in the email header correct?
- Does the corresponding DNS record exist?
- Is the public key published correctly?
- Is the email platform signing with the expected domain?
- Has another service modified the email after signing?
- Has a recent DKIM key rotation invalidated the published configuration?
If your platform manages DKIM automatically, start with its domain authentication dashboard.
Many providers offer diagnostic information that can help identify the problem.
5. DMARC Failed Even Though SPF Passed
This is one of the most confusing authentication errors for email marketers.
Your email passes SPF.
So why does DMARC still fail?
The answer is often domain alignment.
SPF can successfully authenticate the envelope sender domain without that domain aligning with the visible From address.
Consider this example:
| Email identity | Domain |
|---|---|
| Visible From address | newsletter@example.com |
| SPF-authenticated domain | mailer.provider.example |
| DKIM signing domain | provider.example |
SPF might pass for mailer.provider.example.
DKIM might also pass for provider.example.
But neither authenticated domain aligns with the visible From domain, example.com.
Consequently, DMARC fails.
How to fix it:
Configure your email provider to use an aligned DKIM signing domain or, where supported, an appropriately aligned custom return-path domain.
You don’t need both SPF and DKIM to align.
DMARC passes when at least one authentication method both succeeds and aligns with the visible From domain.
6. Legitimate Emails Are Being Rejected
This can happen when a restrictive DMARC policy is introduced before all legitimate sending services have been properly configured.
For example, a business might publish:
v=DMARC1; p=rejectBut its website’s transactional email service might still be using an unaligned DKIM signing domain.
The receiving provider may reject those messages when they fail DMARC.
How to fix it:
Investigate which legitimate messages are failing and why.
Review DMARC reports, email headers and sending service configurations.
Correct the authentication problem wherever possible.
If a policy change is urgently needed to restore important legitimate communications, make it as a controlled, temporary adjustment while resolving the underlying issue.
Don’t simply disable authentication indefinitely.
How to Check SPF, DKIM and DMARC Records
You don’t need to guess whether your email authentication is working.
Several free and commercial tools can inspect DNS records, validate syntax and help identify configuration problems.
However, there’s an important distinction between checking whether records exist and confirming that real emails authenticate correctly.
A valid DNS record doesn’t automatically mean your outgoing messages will pass authentication.
For reliable results, you should perform both DNS-level checks and actual email authentication tests.
Step 1: Check Your SPF Record
Use an SPF record lookup tool to inspect your domain’s published SPF policy.
Useful tools include:
Enter your sending domain and examine the results.
Look for valid SPF syntax, authorised sending services, duplicate SPF records and DNS lookup errors.
If the tool identifies a problem, resolve it before making further changes.
Step 2: Check Your DKIM Record
DKIM verification requires the appropriate selector and signing domain.
For example, a DKIM signature might identify:
d=example.com
s=selector1
The corresponding DNS name would be:
selector1._domainkey.example.comA DKIM lookup can confirm whether the public key is available.
However, this alone doesn’t prove that outgoing messages contain valid signatures.
For that, you’ll need to inspect a real email.
Step 3: Check Your DMARC Record
A DMARC lookup checks the TXT record published at:
_dmarc.example.comThe validation tool should help identify whether the record contains a valid DMARC version, policy and associated tags.
It can also highlight certain syntax errors or missing configuration elements.
If you’re using DMARC reporting, confirm that your report destination is configured correctly.
Step 4: Send a Test Email
Send a genuine message through the same platform you use for marketing campaigns.
Deliver it to a test mailbox, such as a Gmail account you control.
In Gmail, you can open the message’s menu and select Show original to inspect authentication results.
You may see information similar to:
SPF: PASS
DKIM: PASS
DMARC: PASS
These results are encouraging, but look more closely at the authenticated domains.
A complete check should establish:
- Which domain passed SPF.
- Which domain signed the email with DKIM.
- Whether the authenticated domain aligns with the visible From domain.
- Whether DMARC passed.
- Whether the message was delivered to the expected location.
You can also inspect the Authentication-Results header for more detailed information.
Step 5: Review Your DMARC Aggregate Reports
DMARC aggregate reports provide a broader view of authentication activity across participating receiving providers.
They are commonly delivered as XML files.
These reports can include information such as:
- Sending IP addresses.
- Message counts.
- SPF authentication results.
- DKIM authentication results.
- Domain alignment outcomes.
- DMARC policy evaluations.
- Reported message disposition.
For example, a report might reveal that your main marketing platform is authenticating correctly while an older CRM integration is consistently failing alignment.
That’s valuable information.
Without DMARC monitoring, the problem might remain unnoticed until a campaign experiences delivery issues.
How to Read a DMARC Aggregate Report
Raw DMARC XML reports aren’t particularly friendly to non-technical users.
They contain structured data designed for automated processing.
A simplified illustration might look like this:
<record>
  <row>
    <source_ip>192.0.2.10</source_ip>
    <count>125</count>
    <policy_evaluated>
      <disposition>none</disposition>
      <dkim>pass</dkim>
      <spf>fail</spf>
    </policy_evaluated>
  </row>
</record>
This example shows a reporting record associated with 125 messages from a particular IP address.
It indicates that DKIM passed DMARC alignment evaluation while SPF did not.
The source IP shown is reserved for documentation.
Rather than manually reading hundreds of XML files, many businesses use a DMARC reporting platform to consolidate the information into dashboards.
This makes it easier to identify sending sources, authentication trends and potential domain spoofing attempts.
Practical tip: Treat DMARC reports as an ongoing monitoring resource, not a one-off setup exercise.
SPF, DKIM and DMARC Best Practices for Email Marketing
Successful email authentication isn’t simply about publishing three DNS records.
It’s about maintaining a reliable sending environment as your business grows.
The following practices will help you build a stronger foundation for marketing email deliverability.
1. Authenticate Every Legitimate Sending Service
Don’t focus exclusively on your main email marketing platform.
Review your CRM, website notifications, ecommerce integrations, transactional email services and any other system sending messages associated with your domain.
Each legitimate source should have an appropriate authentication configuration.
2. Use an Aligned DKIM Signing Domain
For third-party email marketing platforms, DKIM alignment is often particularly valuable.
A correctly configured DKIM signature can allow DMARC to pass even when the platform uses a separate return-path domain.
Follow your provider’s domain authentication instructions rather than assuming its default configuration uses your own domain.
3. Maintain a Clean SPF Record
Review your SPF record whenever you add or remove sending services.
Avoid unnecessary includes, duplicate records and overly permissive mechanisms.
Keep the SPF 10 DNS lookup limit in mind.
4. Move Towards DMARC Enforcement Carefully
A monitoring policy can be a useful starting point.
But monitoring alone doesn’t request that receiving servers quarantine or reject messages failing DMARC.
Once you’ve identified and corrected legitimate authentication problems, consider progressing towards a stronger enforcement policy.
Make changes deliberately and continue monitoring afterwards.
5. Monitor Spam Complaint Rates
Authentication and sender reputation are connected, but they aren’t identical.
Even perfectly authenticated emails can generate complaints.
Avoid sending campaigns to people who haven’t given appropriate permission.
Make unsubscribing easy, honour unsubscribe requests promptly and regularly review inactive subscribers.
A smaller, engaged mailing list is often more valuable than a large database of uninterested recipients.
6. Separate Marketing and Transactional Email Where Appropriate
Some businesses use dedicated subdomains for different categories of email.
For example:
news.example.comfor marketing communications.receipts.example.comfor transactional messages.example.comfor general business correspondence.
This can make authentication management, reporting and operational separation easier.
However, subdomains aren’t a magic solution for sender reputation problems, and their use should reflect your provider’s capabilities and your business requirements.
7. Protect DKIM Private Keys
DKIM relies on private cryptographic keys remaining secure.
Where your provider manages signing keys, use its recommended security and key rotation practices.
If you operate your own signing infrastructure, ensure that private keys are protected and replaced appropriately.
8. Review Authentication After Platform Changes
Switching email marketing platforms, adding a CRM or changing your website’s mail delivery service can affect authentication.
Make domain verification and email authentication testing part of every relevant migration checklist.
9. Don’t Confuse Authentication With Inbox Placement
SPF, DKIM and DMARC help establish whether messages are authentic.
They don’t guarantee that recipients want those messages.
For stronger email marketing performance, combine authentication with:
- Permission-based list building.
- Relevant audience segmentation.
- Clear and accurate subject lines.
- Consistent sending practices.
- Useful email content.
- Accessible unsubscribe options.
- Regular sender reputation monitoring.
Authentication gets the technical foundations right.
Good marketing gives subscribers a reason to welcome your emails.
Email Authentication Checklist for Marketers
Use this checklist when launching a new sending domain, introducing a marketing platform or reviewing your existing configuration.
Before You Send
- Identify all authorised email sending services.
- Confirm which domains appear in your visible From addresses.
- Check that your SPF record is valid.
- Ensure only one SPF record exists at each relevant DNS name.
- Check for SPF DNS lookup limit problems.
- Configure DKIM signing for your sending platforms.
- Verify that DKIM public keys are published correctly.
- Publish a valid DMARC record.
- Confirm SPF or DKIM alignment with the visible From domain.
- Configure DMARC reporting where appropriate.
- Test authentication using real messages.
- Check the latest requirements of your recipients’ major mailbox providers.
- Confirm that marketing unsubscribe functionality works.
After You Send
- Monitor campaign delivery errors.
- Review spam complaints.
- Investigate unusual authentication failures.
- Check DMARC aggregate reports.
- Remove obsolete sending services from your configuration.
- Reassess authentication after major platform changes.
- Review whether your DMARC enforcement policy remains appropriate.
A regular review helps prevent minor technical issues from becoming major campaign problems.
Frequently Asked Questions About SPF, DKIM and DMARC
Do I Need SPF, DKIM and DMARC for Email Marketing?
Using all three is strongly recommended for businesses sending marketing emails.
SPF authorises sending infrastructure, DKIM verifies signed message integrity, and DMARC evaluates domain alignment while providing policy and reporting capabilities.
Major mailbox providers also require qualifying bulk senders to meet specific authentication standards.
Even if your sending volume is relatively small, proper email authentication is an important part of protecting your domain and supporting reliable delivery.
Can DMARC Pass if SPF Fails?
Yes.
DMARC can pass when DKIM authentication succeeds and the DKIM signing domain aligns with the visible From domain.
SPF doesn’t need to pass if DKIM independently satisfies DMARC’s requirements.
This is particularly useful for emails that have been forwarded or sent through third-party platforms.
Can DMARC Pass if DKIM Fails?
Yes.
If SPF passes and the SPF-authenticated domain aligns with the visible From domain, DMARC can pass even when DKIM fails.
However, configuring both SPF and DKIM correctly provides more authentication resilience.
Does DMARC Improve Email Deliverability?
DMARC can support email deliverability by helping receiving providers establish that messages are legitimately associated with your domain.
It also provides visibility into authentication problems.
However, DMARC doesn’t guarantee inbox placement.
Your sender reputation, recipient engagement, complaint rates and sending practices remain important.
Does SPF, DKIM and DMARC Stop All Phishing Attacks?
No.
These protocols help prevent certain forms of email spoofing and unauthorised domain impersonation.
They don’t prevent attackers from registering lookalike domains, compromising legitimate accounts or using other phishing techniques.
Email authentication should be one part of a broader security strategy.
What Happens When DMARC Authentication Fails?
The outcome depends on the published DMARC policy and the receiving provider’s own handling rules.
A message might be accepted, filtered into spam or rejected.
With p=none, the domain owner requests monitoring without DMARC-based enforcement.
With p=quarantine, the owner requests suspicious handling.
With p=reject, the owner requests rejection.
Receiving providers retain discretion over their final handling decisions.
What Is the Best DMARC Policy for Email Marketing?
There isn’t one universal policy suitable for every business at every stage.
A monitoring policy can help identify legitimate sending sources and configuration issues.
Once those issues are resolved, quarantine or reject policies offer stronger protection against direct domain spoofing.
The long-term goal should be an appropriately enforced policy that doesn’t interfere with legitimate communications.
How Long Do SPF, DKIM and DMARC DNS Changes Take?
DNS changes can become visible relatively quickly, but propagation and caching behaviour vary.
The time required depends partly on DNS time-to-live settings and caching by resolvers.
Some changes may be observable within minutes, while others can take longer.
Always verify the published records before assuming the configuration is active everywhere.
Can I Have More Than One SPF Record?
You shouldn’t publish multiple SPF records at the same DNS name.
Doing so can produce an SPF permanent error.
If several services need SPF authorisation, combine their required mechanisms into one valid record while respecting SPF evaluation limits.
Do I Need to Update SPF When I Change Email Marketing Platforms?
Possibly.
It depends on whether the new platform requires your domain to authorise its sending infrastructure through SPF.
You may also need to configure new DKIM records, domain verification records or a custom return-path domain.
Follow the new provider’s instructions and remove obsolete records only after confirming they’re no longer needed.
Why Are My Marketing Emails Still Going to Spam if Authentication Passes?
Authentication is only one component of deliverability.
Your messages might still be filtered because of poor sender reputation, high complaint rates, low-quality mailing lists, suspicious content or unusual sending behaviour.
Review your email platform’s delivery reports, recipient feedback and available mailbox provider diagnostics.
A successful SPF, DKIM and DMARC check is an important starting point, not a complete deliverability diagnosis.
How Often Should I Check My Email Authentication?
Review authentication whenever you change sending platforms, introduce new email services or update relevant DNS records.
For businesses sending regular campaigns, ongoing DMARC reporting and periodic configuration reviews are sensible practices.
More frequent monitoring may be appropriate for high-volume senders or organisations managing numerous email services.
What’s the Difference Between DMARC and BIMI?
DMARC is an email authentication, policy and reporting protocol.
BIMI, or Brand Indicators for Message Identification, is a separate standard that can enable participating mailbox providers to display verified brand logos alongside eligible authenticated messages.
BIMI generally depends on strong domain authentication and DMARC enforcement, alongside additional provider-specific requirements.
It doesn’t replace SPF, DKIM or DMARC.
What Is ARC Email Authentication?
Authenticated Received Chain (ARC) is a mechanism that allows intermediaries, such as forwarding services and mailing lists, to preserve information about earlier authentication results.
This can help receiving systems evaluate messages whose authentication was affected by forwarding or modification.
ARC doesn’t replace SPF, DKIM or DMARC, and receiving providers decide how much trust to place in ARC information.
Final Thoughts: Email Authentication Is Part of Good Marketing
Email marketing has changed.
It’s no longer enough to build a mailing list, create an attractive campaign and press send.
Mailbox providers want stronger evidence that messages are legitimate. Subscribers expect businesses to protect their identities. And marketers need confidence that their carefully planned communications have a fair opportunity to reach the intended audience.
That’s where SPF, DKIM and DMARC come in.
SPF helps verify that your sending infrastructure is authorised.
DKIM helps confirm the authenticity and integrity of signed messages.
DMARC connects authentication with your visible sending domain, providing policy enforcement and reporting capabilities.
Together, these protocols create a stronger technical foundation for trustworthy email communication.
But remember: authentication is only one part of the equation.
A successful email marketing strategy still depends on relevant content, genuine subscriber relationships, responsible list management and consistent monitoring.
You can have perfectly configured DNS records and still struggle with deliverability if recipients don’t want your messages.
Equally, you can create brilliant campaigns that underperform because your domain authentication is broken.
The strongest results come from getting both sides right.
Your Next Steps
If you haven’t reviewed your email authentication recently, start with three simple actions:
- Check your existing SPF, DKIM and DMARC records. Identify missing records, configuration errors and alignment problems.
- Verify your actual sending platforms. Make sure newsletters, automated campaigns and transactional emails authenticate correctly.
- Monitor and improve. Review DMARC reports, maintain your sending reputation and work towards appropriate policy enforcement.
You don’t need to master every technical detail overnight.
You simply need to recognise that email authentication deserves the same attention as the rest of your marketing infrastructure.
Because even the best email campaign can’t deliver results if it never reaches the people it was designed for.
Protect your domain. Authenticate your emails. Give your marketing the foundation it deserves.